
Most people view desserts and nutrition as mutually exclusive choices. You either indulge in something sweet or you stick to your protein goals—rarely both.
That assumption is outdated. High-protein desserts allow you to satisfy sugar cravings while contributing meaningfully to your daily protein intake. These aren’t diet foods disguised as treats. When made properly, they deliver genuine flavor and texture while serving a functional purpose.
This article presents practical recipes and methods for creating protein-rich desserts at home. You’ll learn how to make protein bars, cookies, and ice cream alternatives that actually taste good. We’ll cover ingredient selection, preparation techniques, common mistakes, and how to adjust recipes to your preferences.
Whether you’re an athlete managing macros, someone trying to increase protein intake, or simply looking for more balanced dessert options, these approaches work.
What High-Protein Desserts Are (and What They Aren’t)
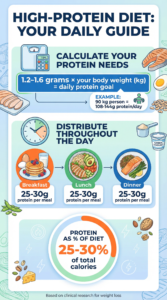
High-protein desserts are sweet foods formulated to deliver significant protein content—typically 10–20+ grams per serving—while maintaining appealing taste and texture.
They’re not:
- Protein shakes or smoothies (though those have their place)
- Sugar-free substitutes that prioritize restriction over enjoyment
- Meal replacements meant to substitute regular food
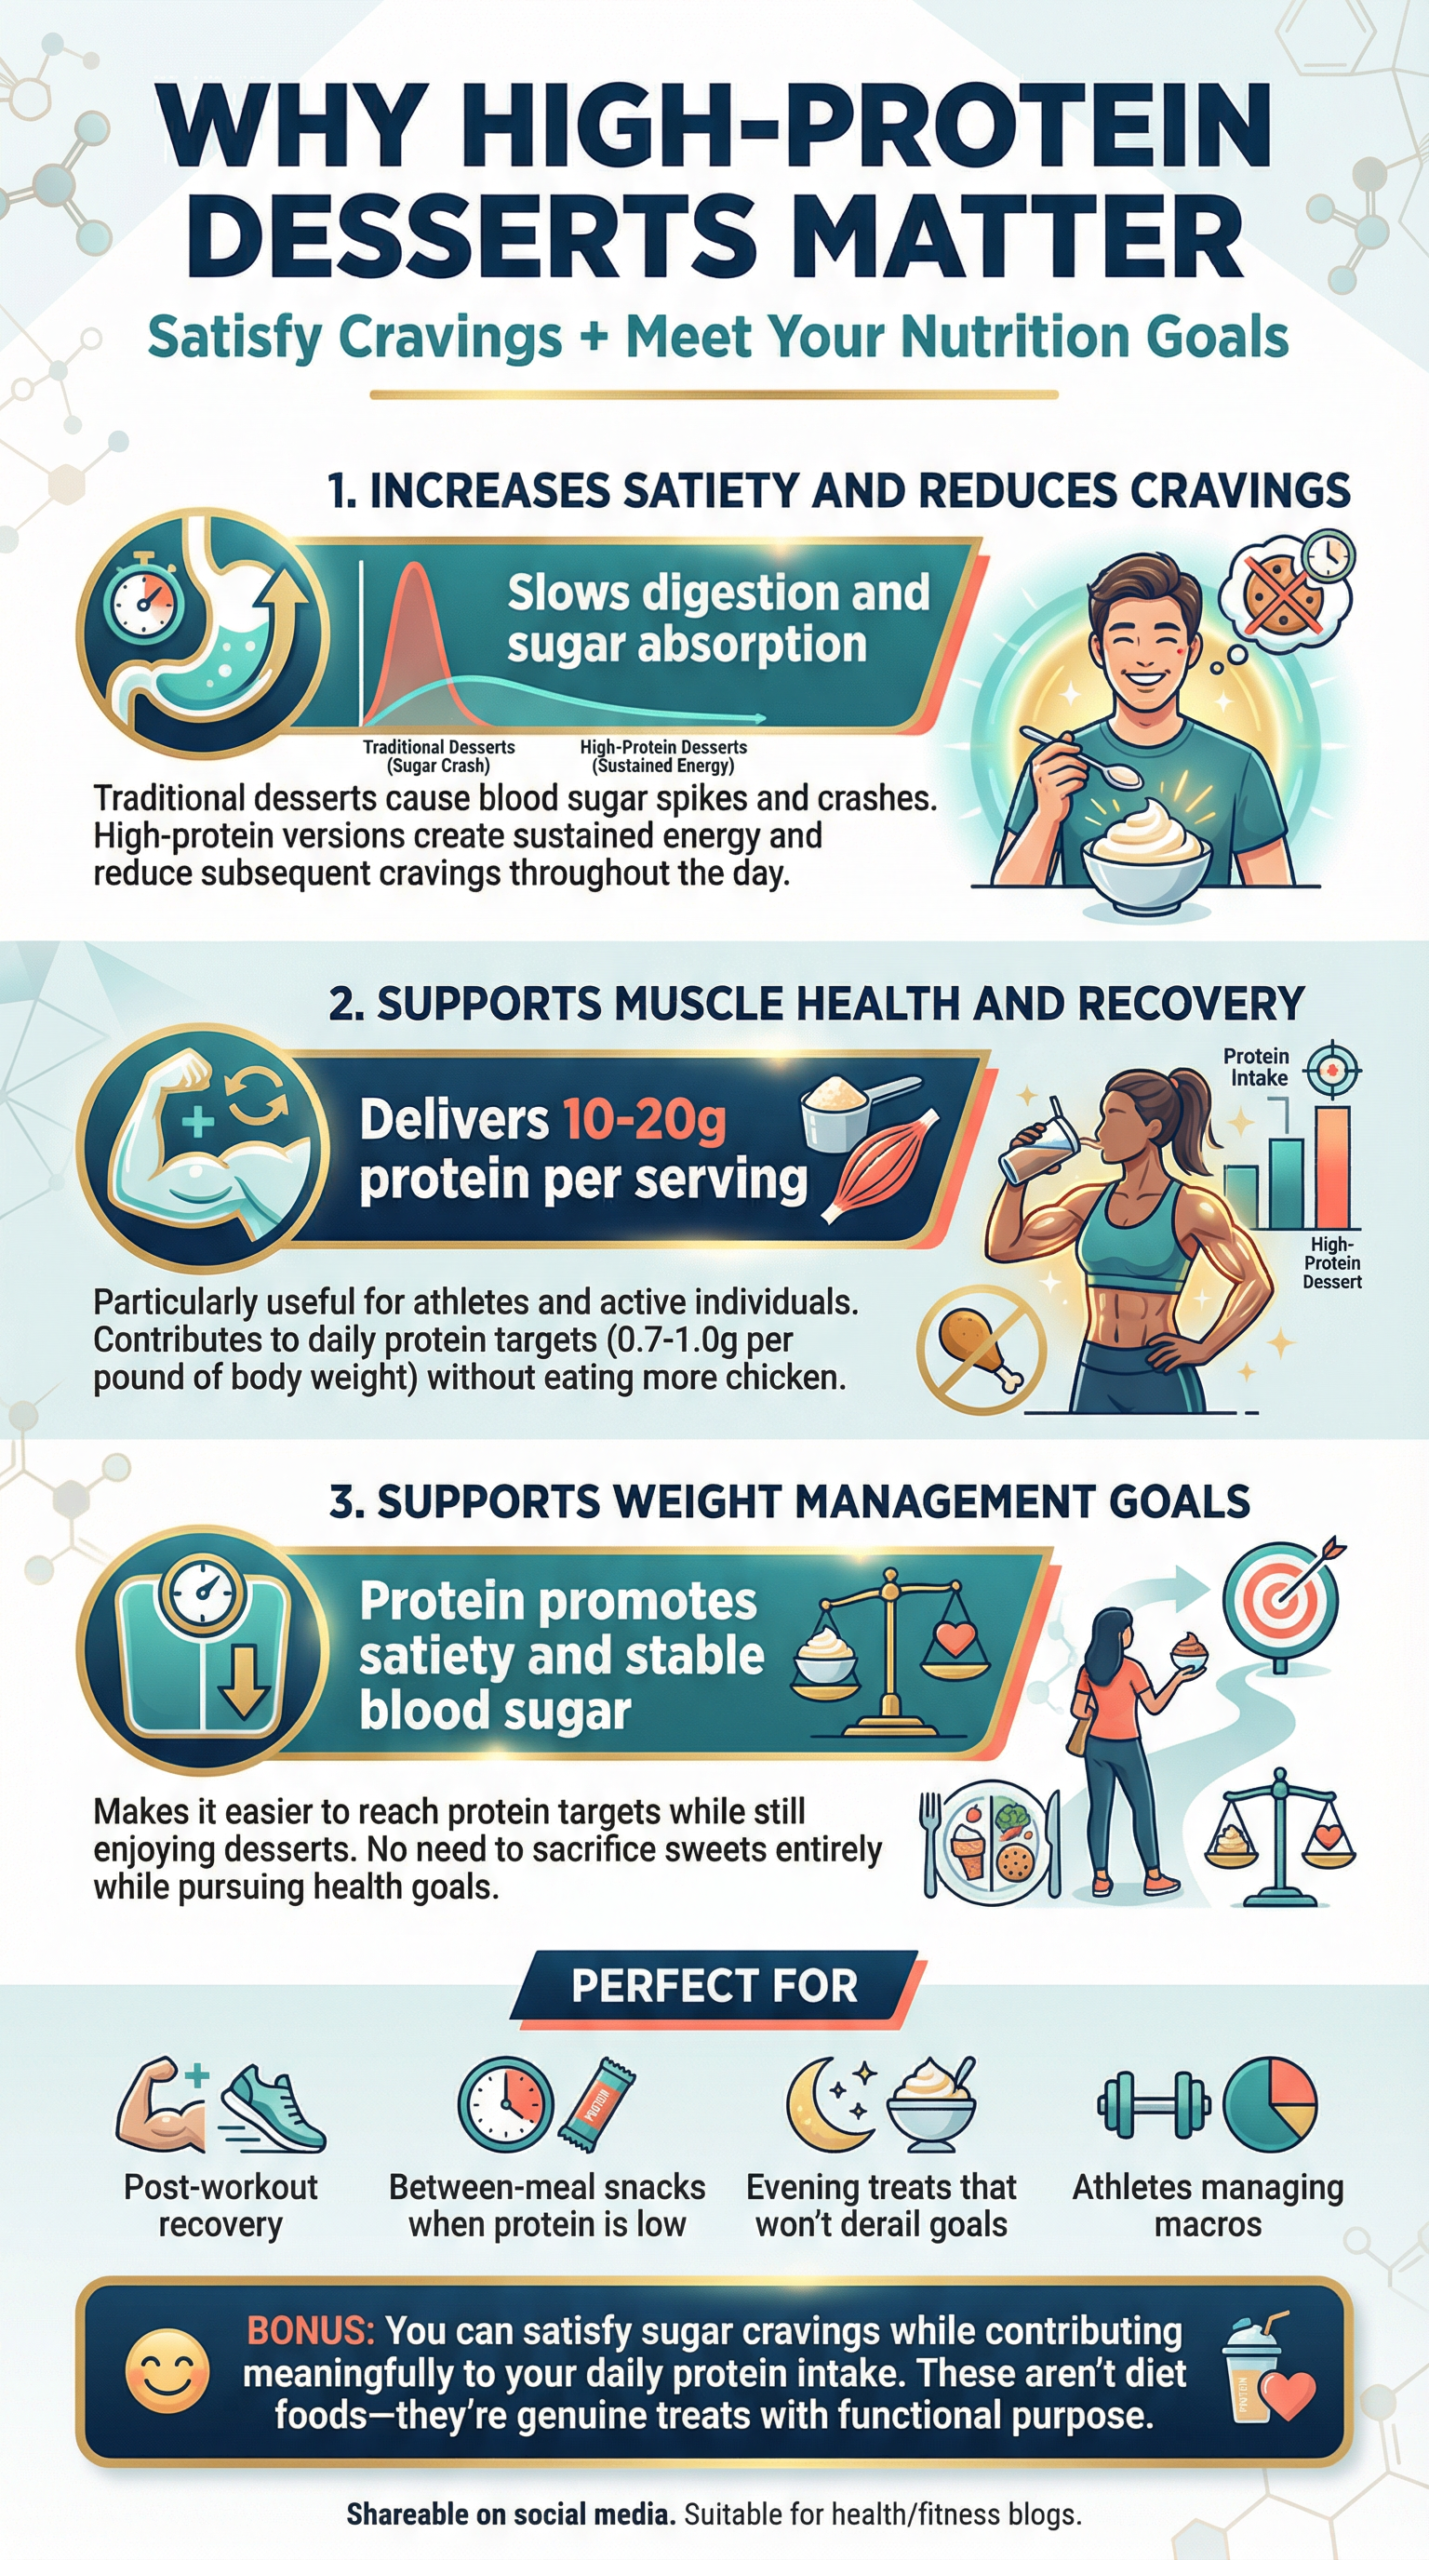
They are practical options for situations where you want something sweet but also need to meet protein targets. Common scenarios include post-workout recovery, between-meal snacks when you’re short on protein for the day, or evening treats that won’t derail nutrition goals.
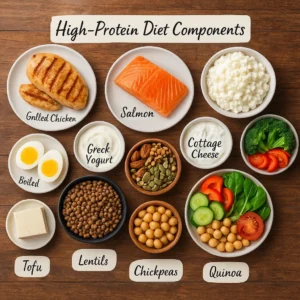
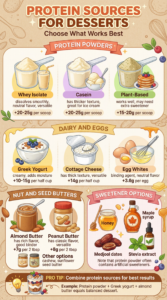
The protein typically comes from powder supplements (whey, casein, plant-based blends), Greek yogurt, cottage cheese, egg whites, or nut butters. These ingredients replace or supplement traditional dessert components like flour, butter, or cream.
Why Protein-Rich Desserts Matter
Protein serves multiple functions beyond muscle building. It promotes satiety, stabilizes blood sugar, and supports tissue repair and immune function.
Traditional desserts—cookies, ice cream, candy—deliver primarily sugar and fat with minimal protein. They cause rapid blood sugar spikes followed by crashes, often leaving you hungry again within an hour or two.
High-protein versions change this equation. The protein content slows digestion and sugar absorption, creating more sustained energy and reducing the likelihood of subsequent cravings.
For people tracking macros or trying to reach specific protein targets (common recommendations range from 0.7–1.0 grams per pound of body weight daily), every meal and snack becomes an opportunity. Desserts that contribute 15–20 grams make those targets significantly easier to hit without eating more chicken breast.
These desserts are particularly useful for:
- Athletes and active individuals with elevated protein needs
- Anyone following higher-protein eating patterns for weight management or body composition goals
- People who struggle to meet protein requirements through meals alone
- Those who prefer not to sacrifice dessert entirely while pursuing health goals
Key Concepts You Need to Understand
Protein Powder Selection
Not all protein powders work equally well in desserts. Whey isolate dissolves smoothly and has a neutral flavor, making it versatile. Casein creates thicker, denser textures—excellent for protein ice cream. Plant-based proteins (pea, rice, hemp blends) work but may require additional sweetener or flavoring to mask earthy notes.
Flavored powders (chocolate, vanilla, cookies and cream) can enhance desserts but may clash with other ingredients. Start with vanilla as your baseline; it pairs with nearly everything.
Texture Management
Protein powder absorbs liquid and can create dry, chalky textures if used incorrectly. Counter this by:
- Adding moisture-rich ingredients (Greek yogurt, applesauce, mashed banana)
- Using enough binding agents (eggs, nut butter, cream cheese)
- Not overbaking—protein-based baked goods continue firming as they cool
Sweetener Strategy
Protein powder often contains artificial sweeteners, which vary widely in sweetness intensity. Taste your powder first. If it’s already quite sweet, reduce added sugars in the recipe. If it’s bland, you’ll need more sweetener than traditional recipes call for.
Natural options include honey, maple syrup, and dates. Sugar alcohols like erythritol work but can cause digestive discomfort in some people if consumed in large amounts.
Step-by-Step: How to Make High-Protein Desserts
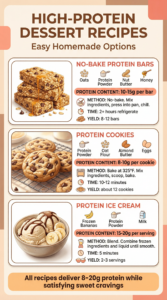
No-Bake Protein Bars
Ingredients:
- 2 cups rolled oats
- 1 cup protein powder (vanilla or chocolate)
- ½ cup natural peanut or almond butter
- ⅓ cup honey or maple syrup
- ¼ cup mini chocolate chips (optional)
- 2–3 tablespoons milk (dairy or non-dairy) as needed
Method:
Combine oats and protein powder in a large bowl. Mix thoroughly—uneven distribution creates inconsistent texture.
In a microwave-safe bowl, warm the nut butter and honey together for 20–30 seconds until easily stirred. This makes mixing dramatically easier.
Pour the wet ingredients into the dry ingredients. Stir aggressively with a sturdy spoon. The mixture should be thick but cohesive. If it’s too crumbly to hold together, add milk one tablespoon at a time. If it’s too sticky to handle, add more oats.
Press firmly into an 8×8 inch pan lined with parchment paper. Use the bottom of a measuring cup or glass to compress the mixture evenly—this prevents bars from falling apart when cut.
Refrigerate for at least two hours. Cut into 8–12 bars depending on desired portion size. Each bar delivers approximately 10–15 grams of protein depending on specific ingredients used.
Store in an airtight container in the refrigerator for up to one week, or freeze for up to three months.
Protein Cookies
Ingredients:
- 1 cup protein powder
- 1 cup oat flour (or blended oats)
- ½ cup natural almond butter
- ⅓ cup honey or maple syrup
- 2 large eggs
- 1 teaspoon vanilla extract
- ½ teaspoon baking powder
- ¼ cup chocolate chips
Method:
Preheat oven to 325°F. Line a baking sheet with parchment paper—protein-based dough sticks more than traditional cookie dough.
Mix protein powder, oat flour, and baking powder in one bowl. Whisk the eggs, almond butter, honey, and vanilla in another until smooth.
Combine wet and dry ingredients. The dough will be thicker and stickier than regular cookie dough. Let it rest for five minutes—the protein powder will absorb liquid and become easier to work with.
Fold in chocolate chips.
Use a cookie scoop or spoon to portion dough onto the baking sheet. Flatten each cookie slightly with your palm—they don’t spread much during baking.
Bake for 10–12 minutes. The edges should be set but the centers still soft. They will firm up as they cool. Overbaking creates hard, dry cookies.
Cool on the baking sheet for five minutes before transferring to a cooling rack.
Yield: approximately 12 cookies, each containing 8–10 grams of protein.
Protein Ice Cream (Blender Method)
Ingredients:
- 2 frozen bananas (sliced before freezing)
- 1 scoop protein powder (vanilla, chocolate, or flavored)
- 2–3 tablespoons milk (adjust for consistency)
- Optional mix-ins: cocoa powder, peanut butter, berries, vanilla extract
Method:
Place frozen banana slices in a high-powered blender or food processor. Blend on high, stopping to scrape down sides as needed. The bananas will go through stages: crumbly, then clumpy, then suddenly smooth and creamy. This takes 3–5 minutes of blending.
Once the banana reaches soft-serve consistency, add protein powder and milk. Blend briefly to incorporate—over-blending can make the mixture soupy.
Add any mix-ins and pulse a few times to distribute.
Serve immediately for soft-serve texture, or freeze for 1–2 hours for firmer ice cream consistency.
Each serving (half the recipe) provides approximately 15–20 grams of protein depending on powder type.
For a richer version, substitute one frozen banana with ½ cup frozen cauliflower (you won’t taste it) and add 2 tablespoons cocoa powder plus 1 tablespoon peanut butter.
Common Pitfalls and How to Avoid Them
Chalky texture: Caused by too much protein powder relative to wet ingredients. Fix by reducing powder slightly or adding Greek yogurt, applesauce, or extra egg.
Dry, crumbly results: Protein-based baked goods contain less fat than traditional versions. Don’t overbake. Remove from oven when centers still look slightly underdone.
Artificial aftertaste: Some protein powders have strong artificial sweetener flavors. Mix powders (half unflavored whey, half flavored) or add natural extracts (vanilla, almond, mint) to mask it.
Bars that won’t hold together: Insufficient binding. Add more nut butter or a tablespoon of coconut oil. Press more firmly when forming bars.
Ice cream that freezes rock-solid: Add a tablespoon of vodka or a pinch of xanthan gum to the mixture before freezing. These prevent ice crystals from forming and keep texture scoopable.
Options and Approaches: Comparing Tradeoffs
Whey vs. Plant-Based Protein
Whey protein dissolves more smoothly and has a milder flavor, making it easier to work with in desserts. It delivers complete amino acids and typically costs less per serving.
Plant-based proteins (pea, rice, hemp blends) work for those avoiding dairy or preferring plant sources. They often have grainier texture and stronger flavors that require more masking with cocoa, vanilla, or fruit. They’re improving rapidly—newer formulations blend better than versions from even two years ago.
Baked vs. No-Bake
No-bake desserts (protein balls, bars, blended ice cream) preserve nutrient content better since nothing is exposed to heat. They’re faster and require less precision.
Baked options (cookies, brownies, muffins) offer more traditional dessert experience and textures but require more careful attention to avoid dryness. They also provide opportunities to use whole food protein sources like eggs and Greek yogurt rather than relying entirely on powder.
Pre-Made vs. Homemade
Commercial high-protein desserts exist—protein bars, cookies, ice cream pints—and they’re convenient. Quality varies dramatically. Many contain 20+ ingredients, multiple artificial sweeteners, and cost $2–4 per serving.
Homemade versions cost roughly 50–70% less per serving, allow complete ingredient control, and often taste better once you’ve refined a few recipes. The time investment is real but not excessive—most recipes take 15–30 minutes of active work.
Practical Checklist
For successful high-protein desserts:
- Start with tested recipes rather than trying to modify traditional recipes on your first attempt
- Invest in one quality protein powder you actually enjoy the taste of
- Measure protein powder by weight if possible—scoops vary widely
- Let batter rest 5–10 minutes before baking to allow protein powder to hydrate
- Underbake slightly—protein baked goods firm up as they cool
- Store in airtight containers; most keep 5–7 days refrigerated
- Freeze extras in individual portions for grab-and-go options
- Track one batch to calculate accurate macros if you’re counting
- Adjust sweetness to your preference—most recipes tolerate 20–30% reduction in sweetener
- Add mix-ins after combining base ingredients to prevent overmixing
FAQs
How much protein should a dessert contain to be considered “high-protein”?
There’s no official definition, but 10+ grams per serving is a reasonable threshold. For context, traditional cookies contain 1–3 grams, regular ice cream contains 3–5 grams per serving. Aim for desserts that deliver at least 10 grams to make a meaningful contribution to daily intake.
Can I replace all the protein powder with Greek yogurt or cottage cheese?
Partially, but not entirely. These whole food sources add protein but also add significant liquid and change texture. In baked recipes, you can replace up to half the protein powder with strained Greek yogurt (strain it through cheesecloth for 30 minutes first to remove excess liquid). For no-bake items like protein ice cream, cottage cheese works excellently when blended smooth.
Why do my protein cookies spread too much or not at all?
Protein powder doesn’t behave like flour. Too much liquid causes spreading; too little creates hockey pucks. Most protein cookie recipes need chilling—refrigerate dough for 30 minutes before baking. Also ensure you’re not substituting ingredients by volume when the recipe calls for weight measurements. A cup of protein powder can weigh anywhere from 90–140 grams depending on the brand.
Do high-protein desserts need to be refrigerated?
It depends on ingredients. Anything containing Greek yogurt, cottage cheese, cream cheese, or fresh fruit requires refrigeration and typically keeps 5–7 days. Protein bars made with just oats, protein powder, and nut butter can sit at room temperature for 2–3 days but keep better refrigerated. When in doubt, refrigerate.
Can I use these desserts as meal replacements?
Occasionally, but it’s not ideal. These desserts provide protein but typically lack the vegetable content, fiber variety, and micronutrient density of balanced meals. They work well as snacks or as part of a meal (protein ice cream with fruit for dessert after dinner), but relying on them as primary food sources creates nutritional gaps.
What’s the best protein powder flavor for making multiple dessert types?
Vanilla. It’s neutral enough to work in nearly any recipe and pairs well with chocolate, fruit, nuts, and spices. Once you’re comfortable with recipes, branch into chocolate, peanut butter, or specialty flavors.
Conclusion
High-protein desserts eliminate the false choice between nutrition and enjoyment. When made properly, they deliver genuine satisfaction while serving functional purposes.
Key takeaways:
- Protein bars, cookies, and ice cream alternatives can each deliver 10–20+ grams of protein per serving while tasting legitimately good
- Success depends on managing texture through proper ingredient ratios, adequate moisture, and not overbaking
- No-bake options offer convenience; baked options provide more traditional dessert experiences
- Homemade versions cost less and allow complete control compared to commercial products
- These desserts work best as part of an overall eating pattern, not as meal replacements
Next step: Choose one recipe from this article and make it this week. Start with no-bake protein bars—they’re the most forgiving for beginners and require no special equipment beyond a mixing bowl and a pan. Once you’ve successfully made one batch, you’ll understand the techniques and can confidently approach the others.
The goal isn’t perfection on your first attempt. It’s proving to yourself that protein-rich desserts can actually work in your regular routine.